Spreadsheets are one of the most efficient ways to display and sort through large amounts of data, and Google Sheets is one of the most intuitive tools you can use to create them. In contrast, WordPress can handle simple tables, but not graphs.
Integrating the former into the latter enables you to get the best out of both worlds. By using Google Sheets, you’ll be able to access that platform’s advanced features and share your results with the world through WordPress. In this article, we’ll teach you how to turn your Google Sheets into tables and graphs for WordPress. Let’s crunch some numbers!
Why You Might Want to Use Google Sheets With WordPress

Google Sheets are a great way to handle large datasets and create tables.
Google Sheets is a cloud version of the tech giant’s take on spreadsheet applications. It packs in all of the features you’ve come to expect, while making it easy to share and collaborate with others on your work.
At first glance, integrating Google Sheets and WordPress might not make much sense. However, if your website uses tables, the combination isn’t as crazy as it seems. In fact, there are three reasons why using both platforms together makes sense:
- WordPress’ built-in table options are rather limited, so using Google Sheets is a welcome alternative.
- The cloud platform provides a better user experience when it comes to dealing with large datasets.
- Turning your Google Sheets data into WordPress tables enables you to modify the latter by updating the former.
To expand on this last benefit, imagine that one of your articles contains a comparison table between multiple WordPress web hosts. You’ll probably want to keep the included data up to date so your content remains evergreen, but opening up the WordPress editor time after time can get annoying.
On the other hand, if you turn a Google Sheet file containing that data into a WordPress table, you can open the former and update its values whenever you need to. Then, your WordPress table will update itself automatically. It’s a pretty neat feature!
Introducing the Inline Google Spreadsheet ViewerPlugin
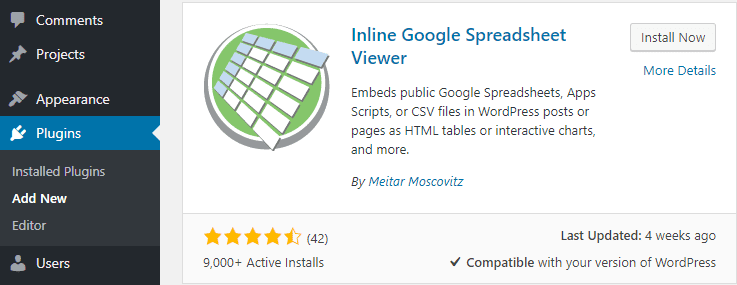
This plugin enables you to take your Google Sheets, Comma-Separated Values (CSV) files, and MySQL databases and turn them into charts, graphs, and tables for WordPress.
The transformation from spreadsheet to table or graph is automatic. In fact, as long as your information is labeled, you can build complex charts with this plugin using only shortcodes. Plus, you can also customize how they look on your WordPress site. Of course, it goes without saying that the plugin works flawlessly with Divi too.
Key Features:
- Turn your Google Sheets, CSV files, and MySQL databases into tables, charts, and graphs.
- Insert your tables and charts into any WordPress post or page using shortcodes.
- Customize the look of your new elements by adding new parameters to your shortcodes.
- Update your WordPress tables and graphs by modifying their parent values on Google Sheets.
Price: Free | More Information
How to Turn Your Google Sheets Into WordPress Tables and Graphs
As usual, we’re going to jump right into the thick of things. So before you move on, you’ll want to install and activate the Inline Google Spreadsheet Viewer plugin. Now, let’s hit the ground running!
How to Prepare Your Google Sheets for Use With WordPress
Before adding your spreadsheets to WordPress, you need to make sure they’re correctly shared. To do this, open the spreadsheet you want to turn into a table or graph and look for the Share button at the top right corner:

Clicking on the button brings up a settings screen. You can choose Anyone with the link can view from the drop-down list below Link sharing on:
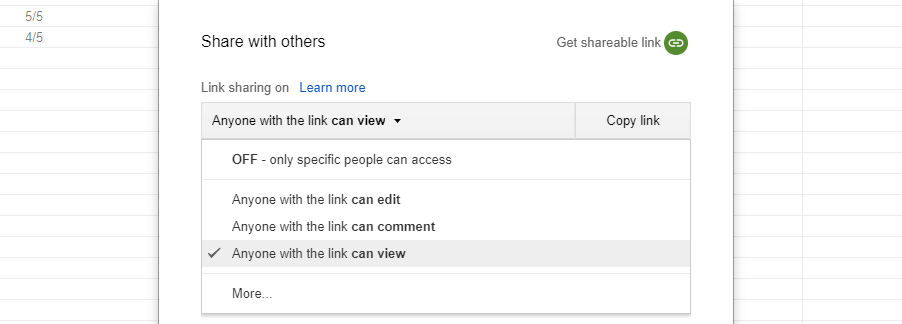
This makes the spreadsheet viewable by anyone. On the other hand, you can access the same drop-down menu and click on the More… option:
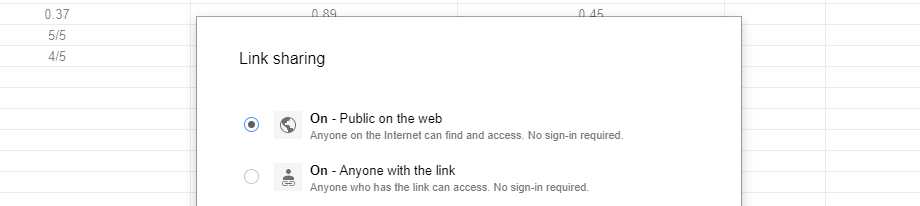
This will send you to a new window, where you’ll find a couple of extra options. In this case, you’ll want to go with On – Public on the web. If you don’t configure your sharing settings to either of these options, WordPress won’t be able to pull the data it needs from your spreadsheets.
Adding Your Google Sheets as Tables Into WordPress
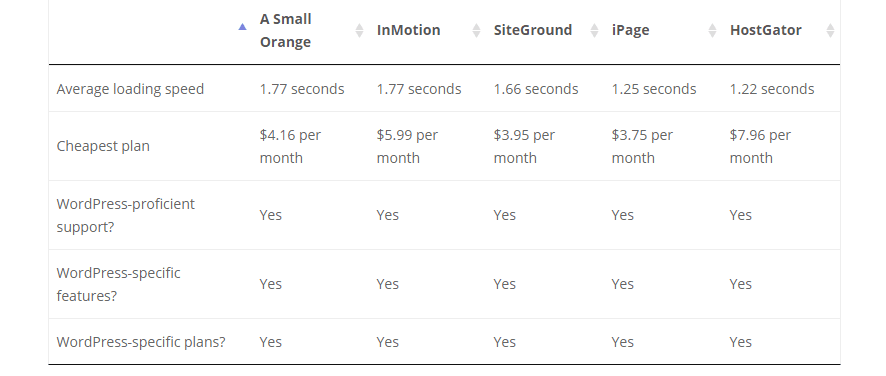
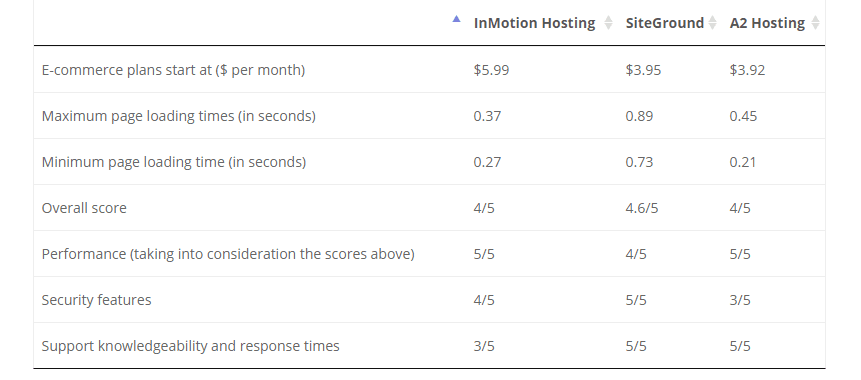
Your Google Sheets based tables are easy on the eyes and they include a sorting feature.
Adding your Google Sheets as tables couldn’t be easier. After activating the plugin, you can go to any of your posts or pages and just paste the link to your Google Sheet anywhere you want. The plugin will automatically pull the data and render it into a table:
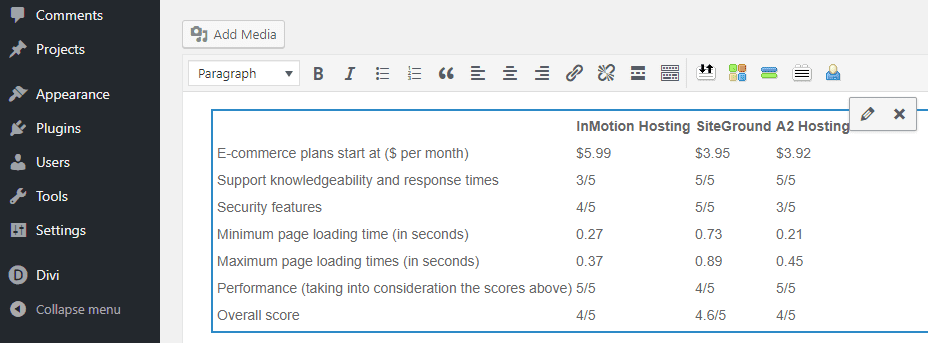
Now, try previewing your post to check out your new table on the front end. The plugin will automatically include borders, bold some of the elements, and even add sorting options to the top of your table:
Moreover, the plugin includes a pagination feature, which makes it easy to look through extensive tables without cramping all of the information in. As far as Divi goes, the feature works just as well if you paste a link to a spreadsheet within any of its modules:
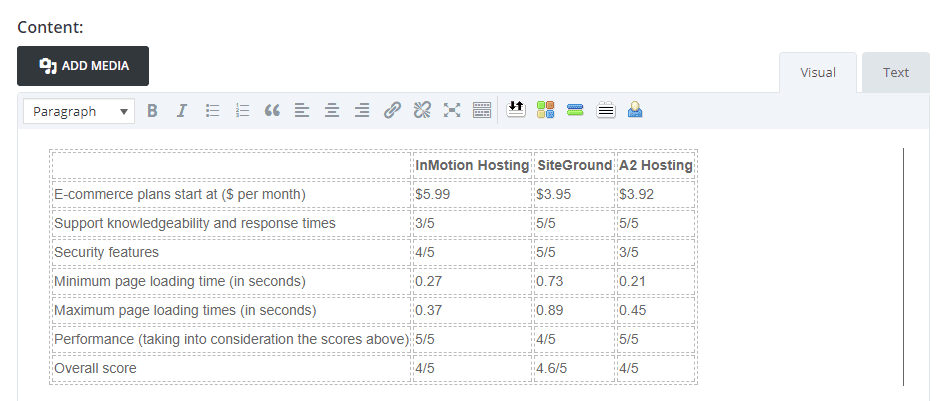
The same applies to the front-end results, so you don’t have to worry about compatibility issues. As for customization, you can’t alter the fields on your tables using the WordPress editor directly. However, what you can do is tweak a couple of their settings with shortcodes. For example, using the [gdoc key=”Your spreadsheet’s URL goes here” class=”no-datatables”] disables the sorting feature on your tables.
You can also turn off the automatic linking feature within your tables, which works for both URLs and emails, using [gdoc key=” Your spreadsheet’s URL goes here ” linkify=”no”] shortcode.
Keep in mind – you only need to use shortcodes for your tables if you want to customize them. If you’re happy with their default style and functionality, you can simply paste a link to them directly into the WordPress editor.
Adding Your Google Sheets as Graphs Into WordPress
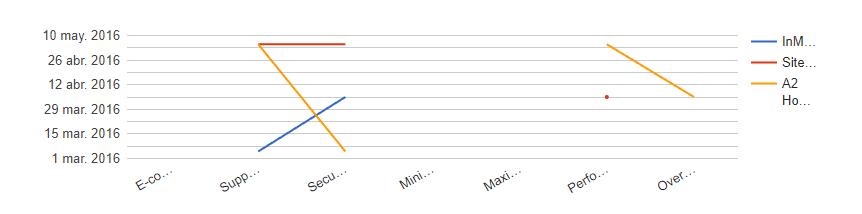
The plugin in question offers over 15 types of graphs for WordPress.
Turning your Google Sheets into WordPress graphs works much the same as with tables. The only difference is that in this case, you need to solely use shortcodes, and there are over 15 different types of graphs available to choose from.
We’re not going to go through all of the styles here, but we’ll tell you how to use the most common types, including bars, pie, and line charts, and how to customize them. For the first one (bar charts), you’ll need to use the [gdoc key=”Your spreadsheet’s URL goes here” chart=”Bar”] shortcode.
Notice that the plugin automatically assigns colors to each of your values, which makes your work much easier:
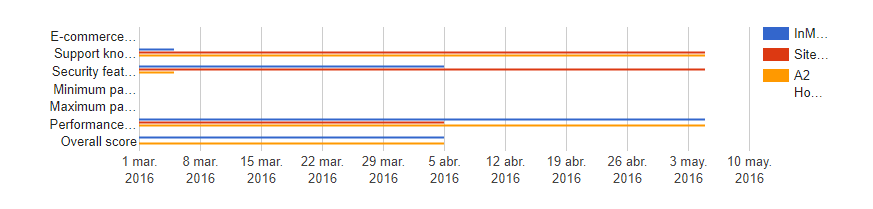
You can also handpick which colors to use by adding a new parameter to the shortcode (for example: [gdoc key=” Your spreadsheet’s URL goes here ” chart=”Bar” chart_colors=”red green”]).
If you want to use different types of graphs, simply change the corresponding value for the chart parameter. For a pie or a line chart, you’d replace bar with pie or line:
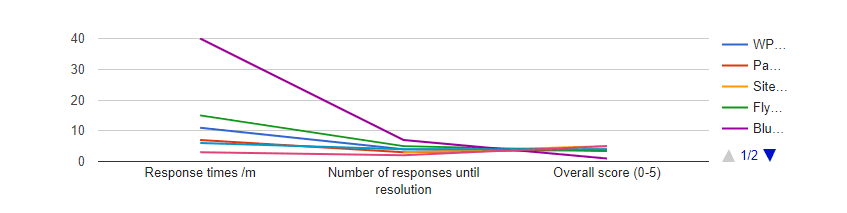
You’ll want to check out the plugin’s WordPress.org page for a full list of all the types of graphs you can use and their parameters. Also, keep in mind that not every Google Sheet will translate into a graph perfectly. In some cases, you’ll need to rearrange the values so they make sense, but that is to be expected for automatically generated elements.
Conclusion
If your work requires you to use spreadsheet tools such as Google Sheets, inserting them into WordPress can help make them more accessible. The process isn’t complicated, and the Inline Google Spreadsheet Viewerplugin enables you to play with a ton of display options for both tables and charts.
Before you add your Google Sheets to WordPress, you’ll need to set their sharing settings to either Public on the web or Anyone with the link. Then, it’s just a matter of using the right shortcode on whichever WordPress page or post you want to add them to.
Do you have any questions about how to turn your Google Sheets into WordPress tables and graphs? Let’s talk about them in the comments section below!
Article thumbnail image by wanpatsorn / shutterstock.com.
